/
CLICK Documentation
CLICK Documentation
- Jim Wilson
Owned by Jim Wilson
2016-07-23
Videos Available
Note that all of these topics are available in videos on YouTube.
Table of Contents
CLICK in a Nutshell
CLICK is a tool available to AgGateway members that helps business analysts and developers comprehend and implement AgGateway Open Standards.
Getting Started with CLICK
Download
- Log in at http://www.aggateway.org.
- In the menu, select eConnectivity | eConnectivity Tools |CLICK. (This may change in the future as AgGateway improves the structure of its website.)
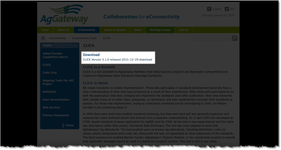
- Click on the download link.
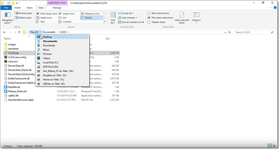
Install
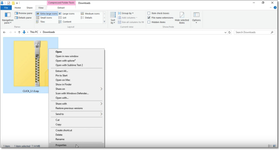
- Go to your download folder.
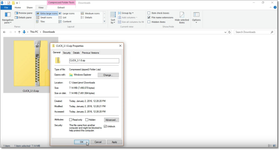
- Right click on the zip file.
- Choose properties.
- Check the Unblock checkbox if you see one.
- Click OK.
- Right click on the download file.
- Choose Extract All.

- Choose a folder to which you would like the files extracted (e.g., Documents folder).
- Once the files are extracted, go to that folder.
Run
- Double click on the CLICK folder.
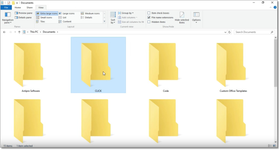
- Double-click on CLICK.exe to launch the application.
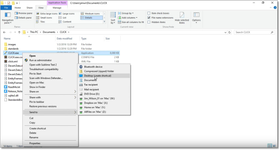
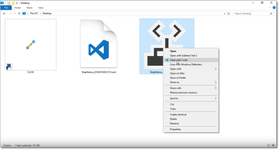
Create a Desktop Shortcut (optional)
- Right click on CLICK.exe.
- Choose Send To from the pop-up menu.
- Choose Desktop (create shortcut).
- Go to desktop.
- Double-click the shortcut to launch CLICK.
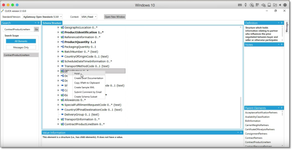
User Interface Overview
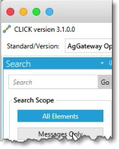
- In the top-right is CLICK version 3.1.0.0. Your version is likely to be a later version.
- Next is the standard and version dropdown list.
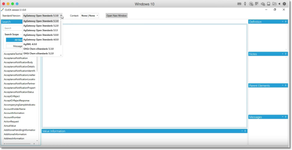
- CLICK supports AgGateway Open Standards going back to version 4, OAGi Chem eStandards going back to version 4, and AgXML version 4.
- Next is the Context dropdown list.
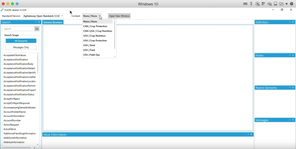
- Over the years, AgGateway has collected notes on implementing standards in various contexts, e.g., crop protection for Canada, seed and feed for the United States.
- Next is the Open New Window button, which will be addressed later in this documentation.
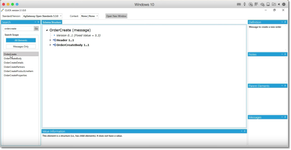
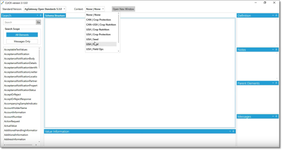
- In the Search section, you can search by All Elements in the standard, or by Messages Only.
 REPLACE
 - Choose Messages Only.
- In the search box, type order.
- Note that the search results include any message with order in its name, which includesOrderChange where Order begins the message name and RetailerOrderSummaryReport where Order occurs in the middle of the name.
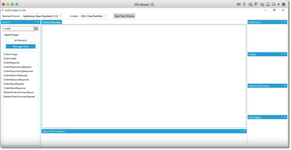
- Click on one of the search results and note that the structure is shown in the treeview in the center.

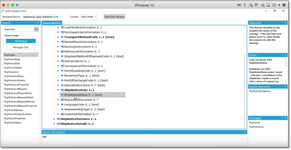
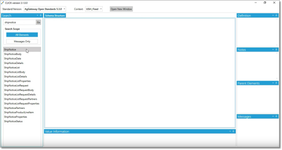
- Next, search All Elements.
- Search for product.
- As you may expect, there is a large number of search results. There are so many, that it exceeds the current supported number of search results displayed.
- You may need to narrow your search to find the results you seek.
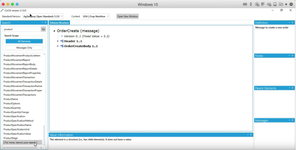
- Search ordercreate.
- As it appears in the search results, click on it so that its structure appears in the main tree view.
- As you click on the disclosure triangles, the structure unfolds.
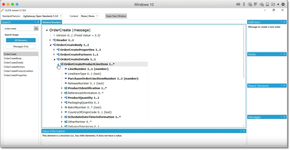
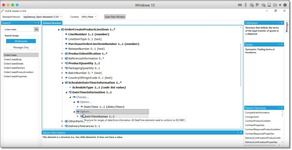
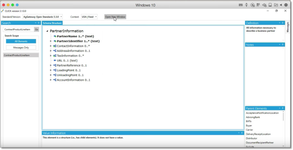
- As you click on various items, in this case ProductIdentifier, content on the right is filled in for that selected item.
- For ProductIdentifier, we see the definition: The unique code or number for a specific product.
- We see Notes, which includes synonyms.
- We see a list of Parent Elements.
- We see a list of Messages in which ProductIdentifier appears.

- When you click on Agency, there is no information to the right. However, there is a code list which includes AGIIS-ProductID, ANSI, AssignedByBuyer, and others.
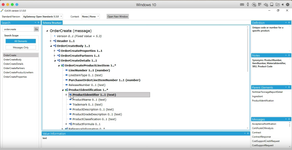
- There are a number of visual cues in CLICK.
- Items that are in bold indicate required, which is supported by the occurrence listed after the item.
- For example, Header indicates 1..1, which means a header is required. One is required and only one is permitted.
- Moving down to OrderCreateProductLineItem, it indicates 1..*, which indicates that one is required but many may occur.
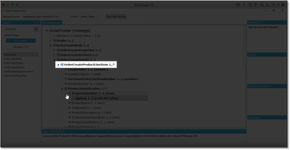
- There are also icons to the left of the text, that give some indication of whether or not an element has structure, or whether it is just a value and whether or not an item may occur many times.
- The icon next to OrderCreateProductLineItem is a structure icon with a plus sign on it, which indicates that there can be more than one. That visual cue is complemented supported by the text that follows, 1..*.
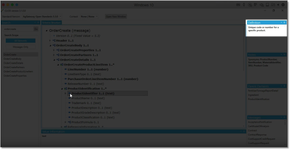
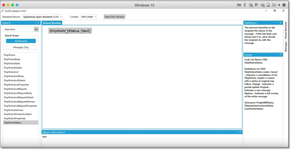
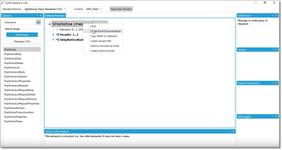
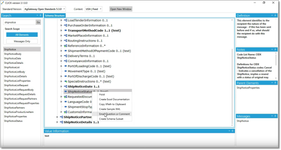
- Consider ShipNotice.
- Choose the USA | Feed context.
- Choose ShipNoticeStatus.
- Hide Parent Elements and Messages to provide more room and resize the Notes section.
- You then will see that there is a Context Note.
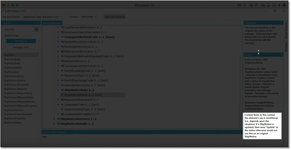
- The notes indicate that when you implement ShipNotice in the context of a feed related process in the United States, that this note applies.
- It says, "In this context [USA | Feed] the elements use is conditional [i.e., depends on the situation]. If a ShipNotice is updated, then send Update as the status otherwise would not use this on an original ShipNotice."
- Notice that when you click on ShipNoticeStatus in the Search Results, which brings ShipNoticeStatus to the top, the context notes go away. This is a very important point because context notes require a drill-down starting at the root of a message.
- Click on ShipNotice in the Messages section to go back to the top.
- Switch back to OrderCreate.
- Drill down to ScheduleDateTimeInformation under the OrderCreateProductLineItem.
- Examine DateTimeInformation. Notice that it is composed of a choice. An implementer would choose DateTime, or DateTimeRange as required.
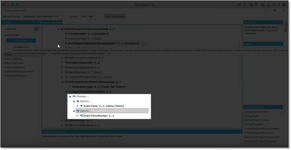
- CLICK indicates this by having a Choose... item in the treeview with enclosed options.
- Notice that when you hover the mouse over DateTimeRange, a tool tip appears.
- In this case it says "Structure for ranges of date/time information. All DateTime elements need to conform to ISO 8601."
- Next, examine ContractProductLineItem.
- Note that a child of ContractProductLineItem is itself, ContractProductLineItem. If you drill down on that you see another ContractProductLineItem.
- This is recursive. CLICK allows you to keep drilling down as far as you want.
- As we'll see later, when we produce Excel documentation, that situation is addressed by just including the first occurrence and just adding the word recursive in parenthesis afterwards.
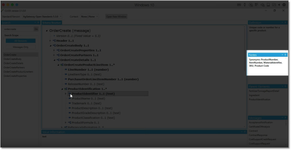
- Another CLICK feature, is to right-click on an element and choose Hoist from the context menu.
- Doing so hoists the selected element to the top and that makes it the root of the displayed tree.
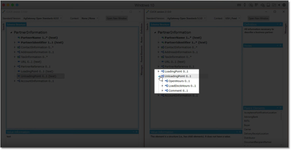
- Another handy feature is Open New Window. Click on Open New Window.
- Doing so creates a new window.
- Set the windows side by side and hide various panels.

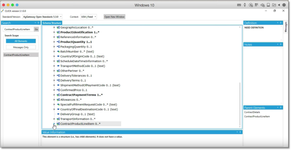
- In the left panel, choose AgGateway Open Standards Version 4.0.0.
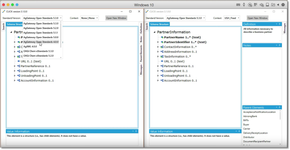
- Search for Partner Information again.
- You'll notice that in Version 4, UnloadingPoint and LoadingPoint are just text.
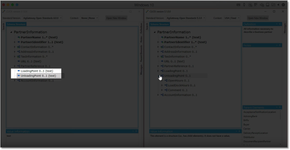
- In Version 5.3, they are structures.
- A final feature to note is that you can navigate by using the arrow keys. Click on an item in the tree view, and the up and down arrow keys go up and down. The right-left arrow keys will expand or collapse structures.
Excel Documentation
- Launch CLICK.
- Select a context, for example, USA | Feed.
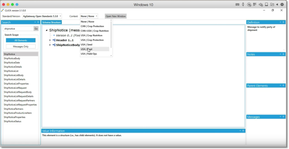
- Search shipnotice and select it in the search results.
- Click on the ShipNotice node in the treeview.
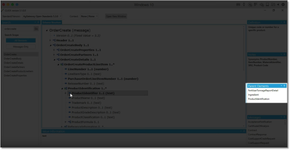
- Right click on ShipNotice in the treeview and choose Create Excel Documentation from the context menu.
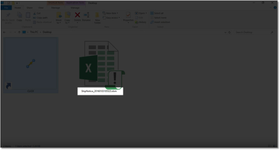
- You are immediately presented with a message informing you that a file is being created in the background and will be saved on the desktop.
- There are a couple things to note about the file name. It starts with the name on the element that we right clicked on, in this case ShipNotice. It is followed by a date-time stamp and by the extension xlsm, which indicates a macro-enabled excel file.
- Open the file.
- The first thing to note is that at the top is a security warning that tells us that the macros have been disabled.
- Click on Enable Content. You'll see why this is important in a moment.
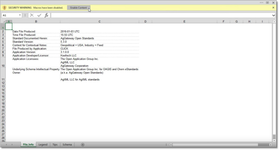
- The contents on the File_Info worksheet (i.e., tab) have the date the file was produced, the time, what standard is being documented, what its version is, the context for the contextual notes, information about the application itself, and license information.
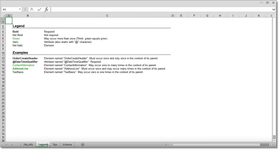
- The Legend worksheet explains various visual cues, which should be consistent with CLICK.
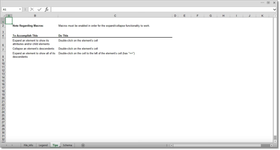
- The next worksheet provides a few tips.
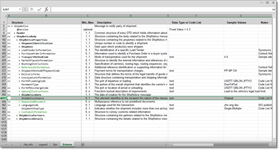
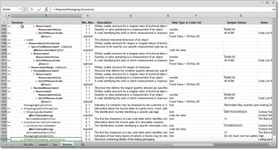
- Next is the Schema worksheet. This is the main worksheet.

- Double click on ShipNotice. Doing so should reveal the ShipNotice attributes and child elements, which in this case includes Header and ShipNoticeBody.
- Consider the various columns that are available. Min..Max in column C, which tells whether attributes are required or optional, and the occurrence of elements. In this case Header, one is required, and only one is permitted, same with ShipNotice Body. You'll notice other numbers as you expand other elements. Next is Description, the Data Type or Code List, which version as a fixed value equal to 5.3, Sample Values, Notes, and xPath. There is no content in them for now, but there will be as you expand them.
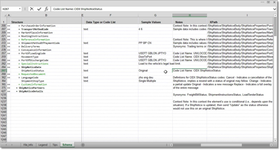
- Drill down to ShipNoticeStatus.
- You'll see that on line 267, ShipNoticeStatus is not bold, indicating that it is not required, which corresponds to column C, which says that it has a minimum occurrence of 0 and a maximum occurrence of 1.
- Note that ShipNoticeDate right above it on row 264 is required and is bold. (Note that your row number may not be 264, depending on what version you exported to Excel.)
- Now let's consider Excel behavior. This isn't CLICK specific or specific to this file, it is just how Excel behaves, which may be helpful in terms of how you use the Excel files that are produced.
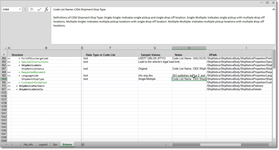
- You can see that in column H for ShipNotice, which is the notes, that only some of the content is visible. There are a couple of ways to see more of the content.
- One way is to double click on the cell itself, which puts Excel in edit mode for that cell, which allows you to see more of the content–all the way down to the context note.
- We have the context note because we chose USA | Feed as the context and it pulled that information and included it in the notes.
- Press the Esc key on your keyboard to exit edit mode.
- Note that if you press enter by mistake, just do Ctrl+Z, or click the undo button on the toolbar.
- Another approach is to can down on the formula bar to make it bigger.
- As you go to different cells you can see all of the content.
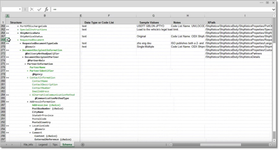
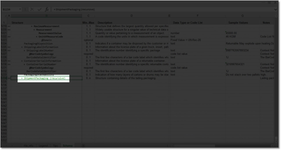
- Some elements have two plus signs. When you double-click on a cell with two plus signs, it expands all of the descendants. For example, if we double-click on RequestedDocument, it expands all of the descendants.
- If you double-click on the cell with two plus signs again, it will collapse it all.
- If you double click on the two plus signs to the left of ShipNotice, it expands all of the content.
- Circling back to a comment earlier in this documentation, note the recursive indication for ShipmentPackaging.
Other Features
Copy XPath to Clipboard
- Go to ShipNoticeStatus.
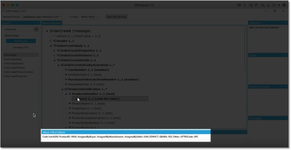
- Right click on it and choose Copy XPath to Clipboard.
- Past it all into a text editor. (Consider Microsoft's Visual Studio Code. It's free and available for Windows, Mac, and Linux. That's what is shown in the screen-capture images that follow.)
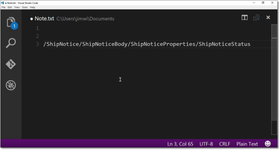
- It includes the XPath all the way from the root.
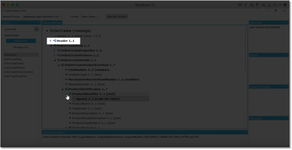
- Hoist RoutingInstructions to the top and copy that XPath to clipboard.
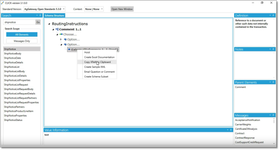
- Paste into a text editor.
- Note that once again it goes from the top of the treeview, while not including Choice and Options.
Create Sample XML
- Right-click on an element and choose Create Sample XML.
- When creating sample XML document, just like creating Excel documentation, it produces the file in the background and presents a message indicating that.
- If you switch to the desktop you will see that the file is present. Open it in a text editor.
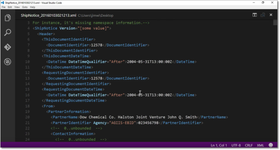
- Some sample values are more realistic than others.
- In some cases there is a choice, where both choices are included.
- The XML file that CLICK produces is not valid against the corresponding XML schema. Notably, it is missing the XML namespace references.
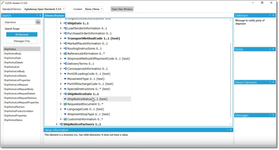
Create Schema Subset
- Right-click on an element and select Create Schema Subset. When creating an XML schema subset, it produces the file in the background and saves it to the desktop.
- Open the file in a text editor.
- The contrast between the CLICK presentation and the text you see in the text editor should emphasize the purpose of CLICK: Hide all of the angle brackets, element declarations, and type definitions; and just present the schema in an intuitive way.
Provide Feedback
- Select USA | Feed as the context.
- Right click on ShipNoticeStatus and choose Email Question or Comment.
- Past the content into a text editor (or for real comments, the body of a new email).
, multiple selections available,
Related content
CLICK
CLICK
Read with this
2024 AgGateway Annual Conference
2024 AgGateway Annual Conference
More like this
agricultural commodity
agricultural commodity
Read with this